Windows comes bundled with a security suite called Windows Security. This application offers protection against viruses, ransomware, and malware, as well as many other options. Local Security Agency (LSA) protection is part of device protection, and we'll explain how and why to enable it to protect your system.
recommend:How to fix the "Access denied" error in the NVIDIA Control Panel on Windows 11/10?
What is LSA protection?
An Local Security Administration (LSA) is a protection setting that enforces local security policies within a system to manage user authentication, account login, access control, and token generation processes to verify user identity and permissions. Windows provides Local Security Administration (LSA) protection as part of the Local Security Administration Security Service (LSASS) process. Some basic features include:
- Verify the password and allow the user to log in.
- Enforced security policies determine whether a user has the right to access specific resources on the system.
- After verifying the user's credentials, LSA generates a security token for the process and services to determine whether they have the necessary rights to perform a specific operation.
- By securely storing and managing credentials, it helps Windows manage features such as Single Sign-On (SSO).
LSA also starts with a secure, trusted environment and interacts with a Trusted Platform Module (TPM) to protect credentials. You can learn more about LSA here. Official Microsoft documentation。
1. Enable LSA protection from the Windows Security application.
By default, the Windows Security application will always be running in the background to protect your system. If you turn off LSA on your device, the Windows Security icon in the Taskbar system tray will display a warning symbol with a suggested message.
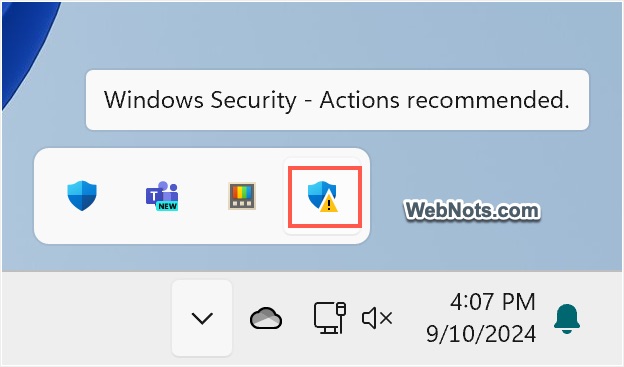
As mentioned earlier, you can easily enable it from the Windows Security app.
- Type "security" in the Windows search box and open the Windows Security application. You can also click the Windows Security icon in the taskbar to open the application.
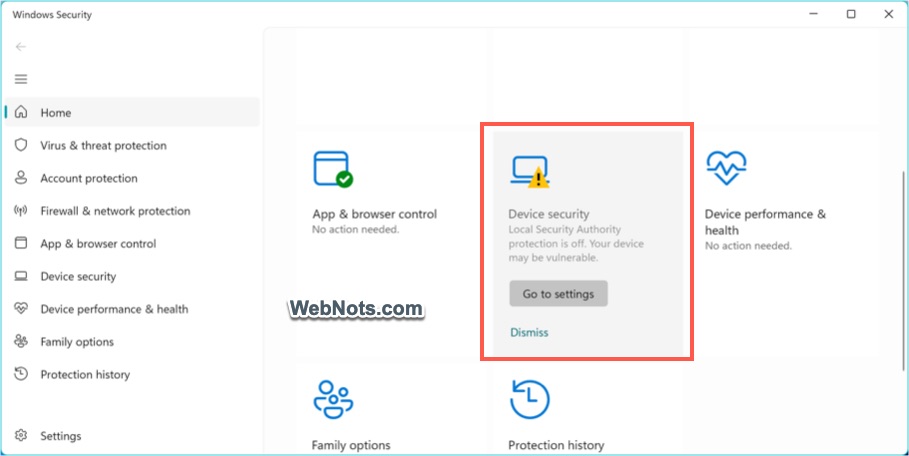
- You will see a "Device Security" option under the "Home" tab, which will display a warning symbol; click it. Otherwise, go to the "Device Security" section in the sidebar.
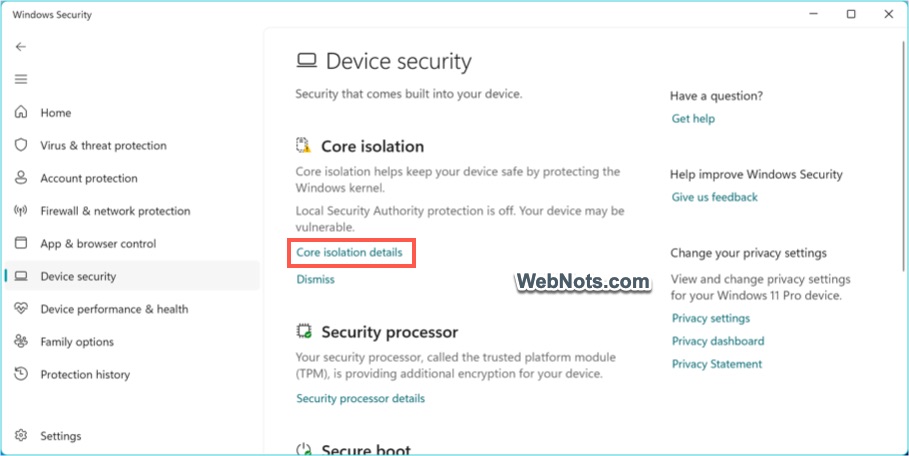
- Click the "Core Isolation Details" link displayed in the "Core Isolation" section.
- You will see a "Local security authority protection" section indicating that this option is off and your device may be vulnerable. Turn on the button to enable it.
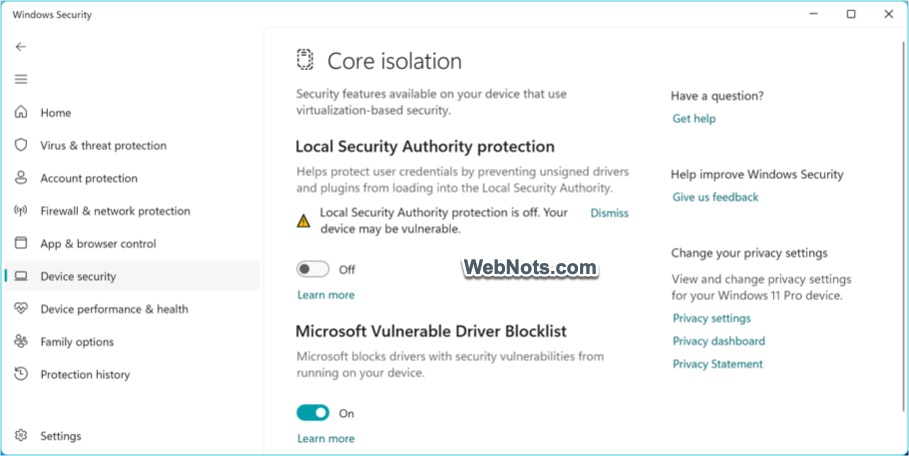
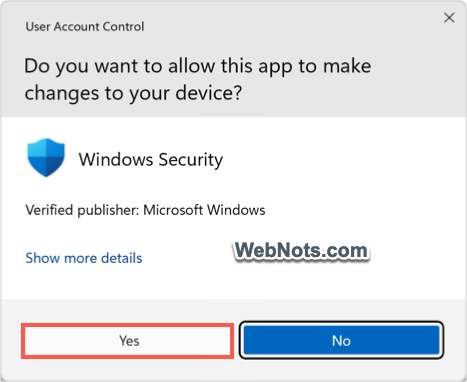
- A User Account Control dialog box will pop up; click the "Yes" button to confirm the changes.
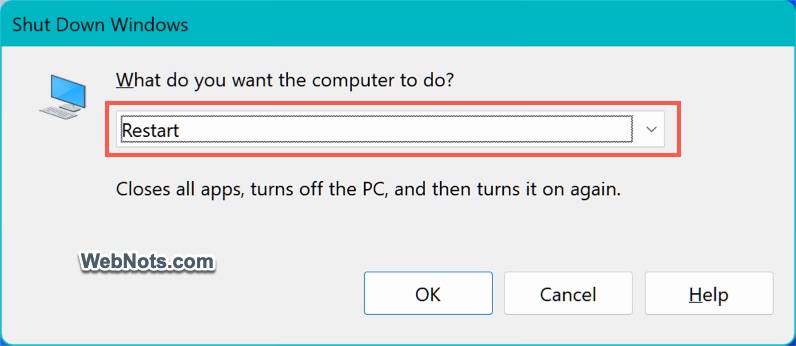
- A notification will appear in the Windows Security app that says, "This change requires you to restart your device."

- Save your other work, then press "Alt + F4". Select the "Restart" option and click the "OK" button to restart your PC.
Now, check the Windows Security icon in the taskbar. It should show a green tick mark with a message indicating that no action is required.
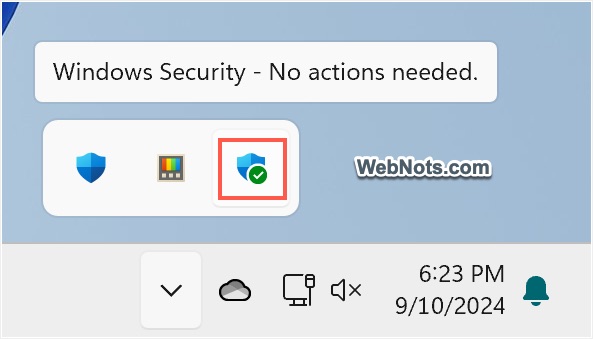
The Device Security option in the Windows Security app will also display a green checkmark.

Earlier versions of Windows had a bug fixed in KB5007651 (version 1.0.2306.10002) for Windows security. If you are unable to enable it as described above and still see the warning on the taskbar, you can follow one of the following options.
2. Enable LSA protection using the policy editor.
Windows Pro Edition comes with the Local Group Policy Editor application, which helps modify security policies.
- Press "Windows logo + R" to open the Run dialog box.
- type gpedit.msc In the box, click the "OK" button.
- This will open the Local Group Policy Editor application and navigate to the "Computer Configuration > Administrative Templates > System > Local Security Administration" section.
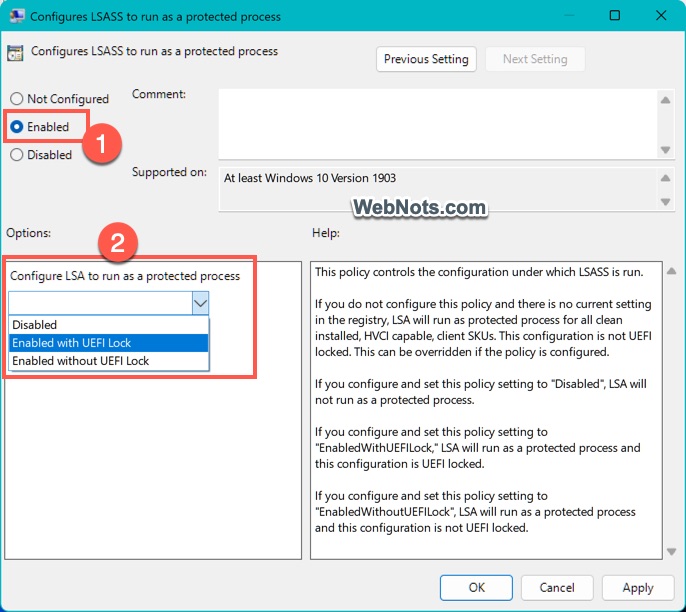
- Right-click the "Configure LSASS as a protection process" policy and then select the "Edit" option.
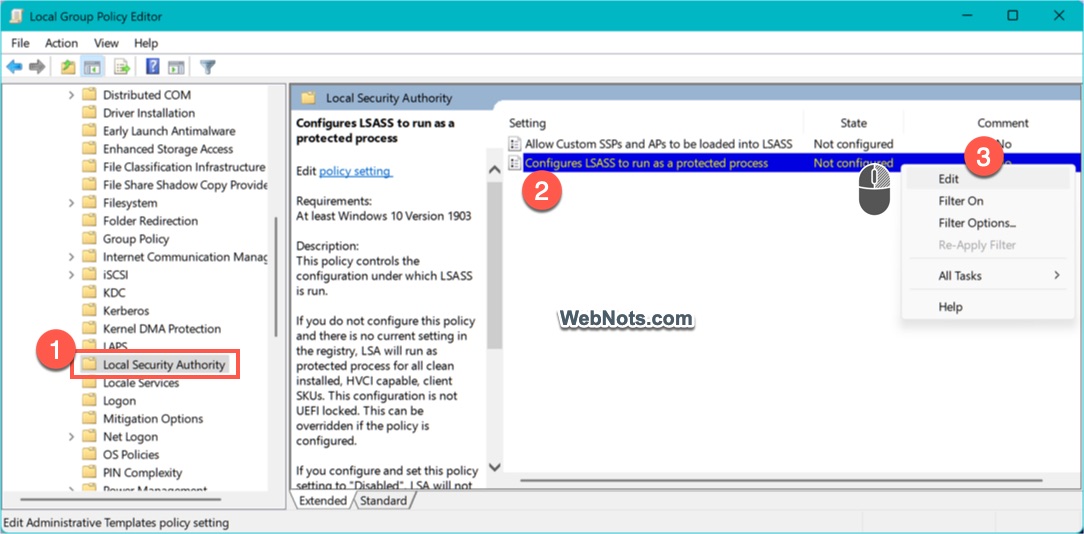
- In the pop-up window, select the "Enable" option.
- Click the “Configure LSA to run as a protected process” drop-down list below, and then select the “Enable with UEFI Lock” option.
- Click "Apply," and then click the "OK" button to save the changes.
You may need to restart your PC for the changes to take effect, and the LSA protection warning should then disappear.
3. Enable LSA protection using the Registry Editor.
Windows Home Edition does not include the Local Group Policy Editor application; in this case, you can make changes using the Registry Editor.
- Press "Windows logo + R" to open the Run dialog box.
- type Registration Then click "OK" to open the Registry Editor application.
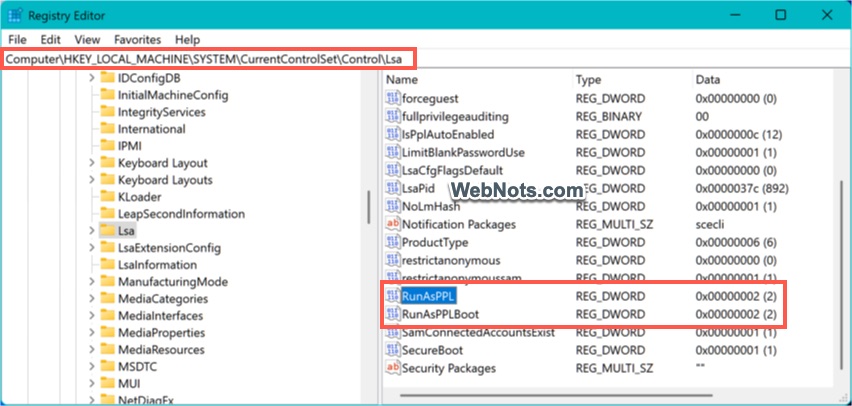
- Navigate to Computer\HKEY_LOCAL_MACHINE\SYSTEM\CurrentControlSet\Control\LSA Folder.
- Locate the RunAsppl and RunasPplBoot keys in the right pane.
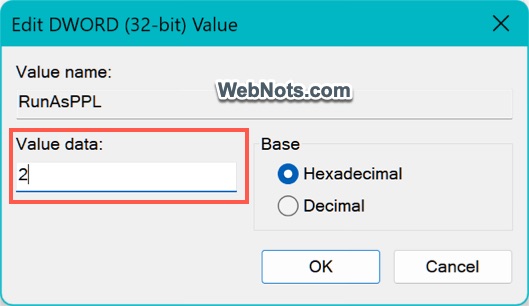
- First, double-click RunAsppl and set the "Value data" to 2. Similarly, double-click RunasPplBoot and set the "Value data" to 2.
- Click the "OK" button to apply your changes and close the Registry Editor application.
- You should now see LSA protection in the Windows Security application.
Please note that it is always a good idea to back up the current registry entries before making changes to the Registry Editor.
Why do we need to enable LSA?
When you disable LSA, your system will face two main risks:
- There will be no central authority to verify user actions or ensure that users can only access content they permit.
- Attackers can gain unauthorized access to the system, steal credentials, or escalate privileges.
LSAs, or Local Security Authorities, are an important way to protect your computer from unauthorized access. Therefore, ensure they are always enabled in your Windows security application to guarantee proper identity and access management.