
How to resolve the 0xC00D3E8C error in Movies & TV on Windows 11?
The Movies & TV app replaces the classic Windows Media Player as the default video app in Windows 11. However, due to limited playback options and codec support, you may encounter a 0xC00D3E8C error when trying to play videos using this app.
This error is usually triggered by codec incompatibility. However, other factors can also cause this problem, including application malfunctions. Here, we show some troubleshooting steps to help you fix this error and play your media files.
recommend:How to fix Minecraft OpenGL errors on Windows
1. Repair or reset the video application.
Windows includes a built-in repair tool to fix temporary glitches in Microsoft Store apps. You can use this repair feature to fix application problems without affecting the application's data.
To fix the Movies & TV app:
- according to win + i Open set up.
- Next, open application The tabs in the left pane.

How to resolve the 0xC00D3E8C error in Movies & TV on Windows 11?
- Next, click Applications and features In the right pane.
- Waiting for the application list to load and be found Movie and TV apps.

- Click the three-dot menu next to the application name, and then select... Advanced Options.
- Scroll down to Reset Partial and click repair Button.
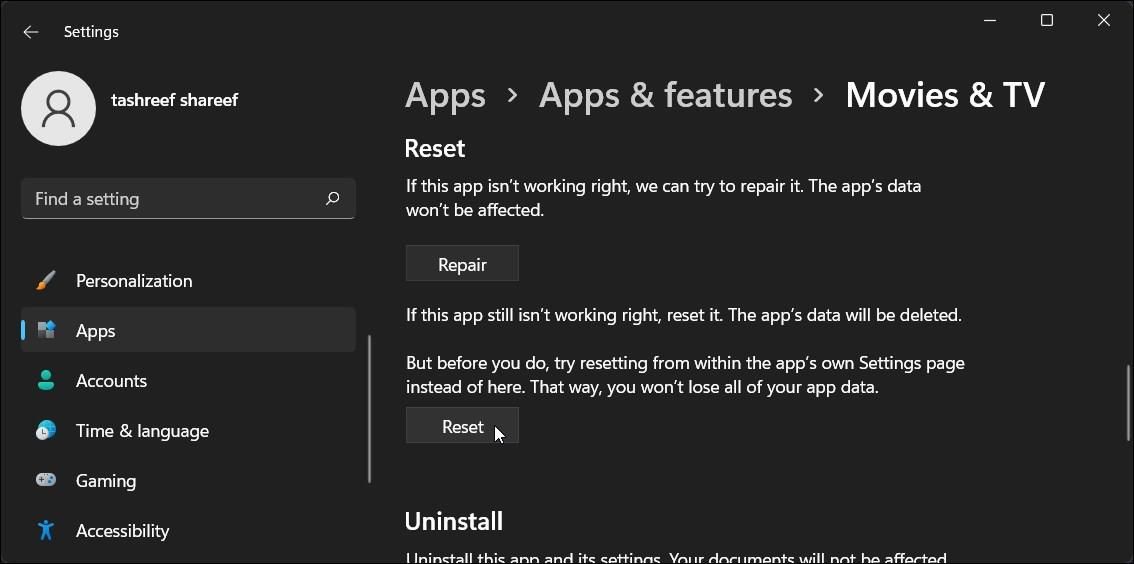
- After completion, you will notice repair The button indicates that the operation was successful.
- Restart Film and television The application was reviewed and any improvements were made.
If the error persists, you can try the reset option. Before doing so, check for available application updates and install them.
2. Update the video application
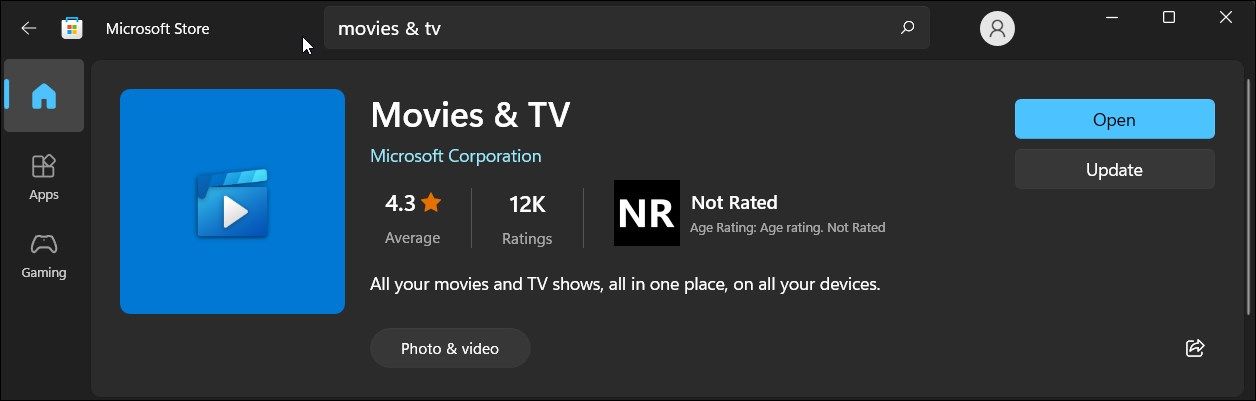
New application updates often bring bug fixes and performance improvements. Therefore, before you decide to reset your application, check for available updates and install them to see if it helps resolve the bugs.
To update the Movies & TV app:
- roll out Microsoft Store app.
- search Movies and television.
- Click renew Click the button to download the update. This may take some time, depending on your internet connection speed.
- Click Open Restart the application and check if there are any improvements.
recommend:Fix Xbox app not running on Windows
3. Reset the Movies and TV apps in Windows 11
You can reset the Movies and TV apps to their default state to fix issues triggered by corrupted data and cache.
To reset the Movies & TV app:
- Open Windows Settings Control panel.
- go application Then click Applications and features.
- Click Three-point menu beside Film and television And select Advanced Options.
- Scroll down and click Reset Button.
- Read the warning and click Reset Confirm the action.
- Reset and start Film and television The application then checks whether the error has been resolved.
4. Reinstall the video application.
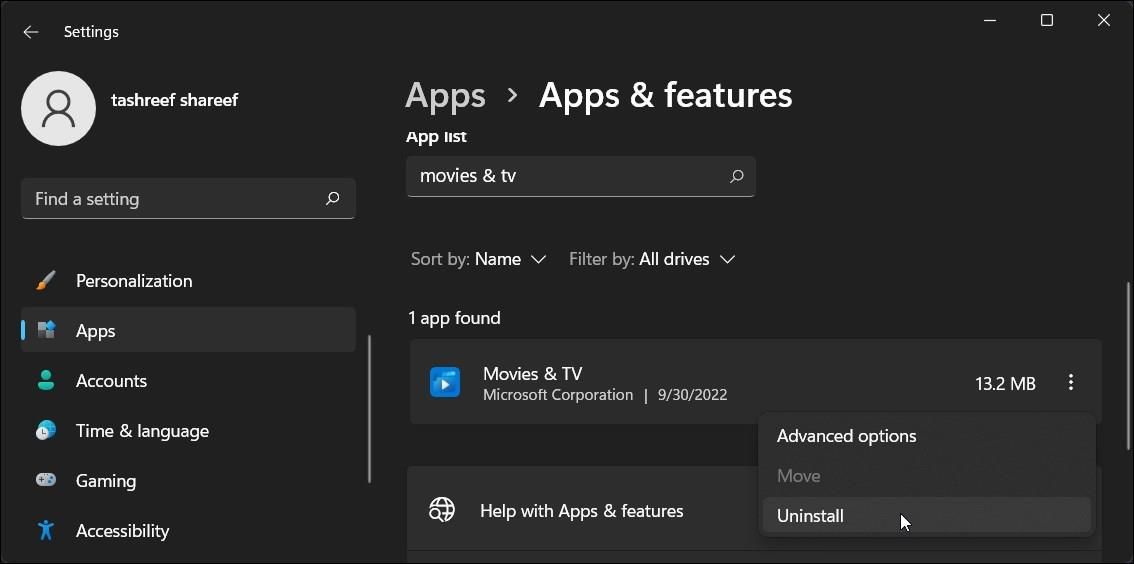
If the error is triggered by an application problem, try reinstalling. You can uninstall Microsoft Store apps from the Settings panel or using PowerShell.
To uninstall the movie and TV app:
- according to win + i Open set up.
- go Applications > Applications and features.
- Click Three-point menu The side Film and television Application and select uninstall.
- Click uninstall Double-check the actions.
- Once finished, go to the Movies & TV Apps page and install the app.
To uninstall the Movies and TV apps using PowerShell:
- according to win + S And input Power supply casing.
- Right-click Power supply casing And select Run as administratorClick Yes When prompted by User Account Control.
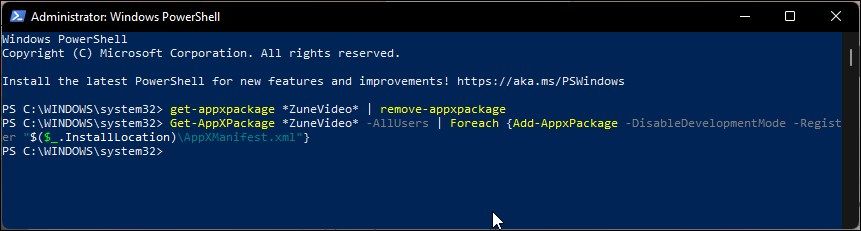
- In the PowerShell window, copy and paste the following command:
get-appxpackage *ZuneVideo* | remove-appxpackage - After uninstalling, restart your PC.
- To reinstall the Movies & TV app, use the following command in PowerShell as an administrator:
Get-AppXPackage *ZuneVideo* -AllUsers | Foreach {Add-AppxPackage -DisableDevelopmentMode -Register "$($_.InstallLocation)\AppXManifest.xml"}c - Restart your PC again and check if there are any improvements.
recommend:BerqWP, the WordPress PageSpeed optimization plugin
5. Install a third-party decoder
If an error occurs due to an unsupported file format, you can install the necessary codecs to play the video. K-Lite Codec Pack and Advanced Shark007 Codecs are popular codecs for Windows operating systems.
Install the K-Lite codec package:
- Go to the K-Lite codec guide page.
- K-Lite offers multiple versions of the codec. Select and click. basic, standard or Full version Choose the version you want to download.
- Next, select your server to download the installation file.
- Run the installation file and select advanced As an installation mode.

- Click Next.
- Click the dropdown below. Preferred VideoPlayers And select Movie and TV apps.

- Click Next.
- Inside Select Components On the screen, deselect any components you don't want to install. If none are found, keep the default and click N.electronicxt。
- Continue pressing Next Until you arrive Other software offers Screen.

- Click here. decline.
- Next, click Install Then click Finish.
Now try playing the video file to see if the error persists. If so, go to the K-Lite Codec Media Foundation Codecs page. Here, you can manually download some codecs used by movie and TV apps. Download the Appx packages and run them to install or update the necessary codecs.
6. Convert the file to MWA/WMV format.
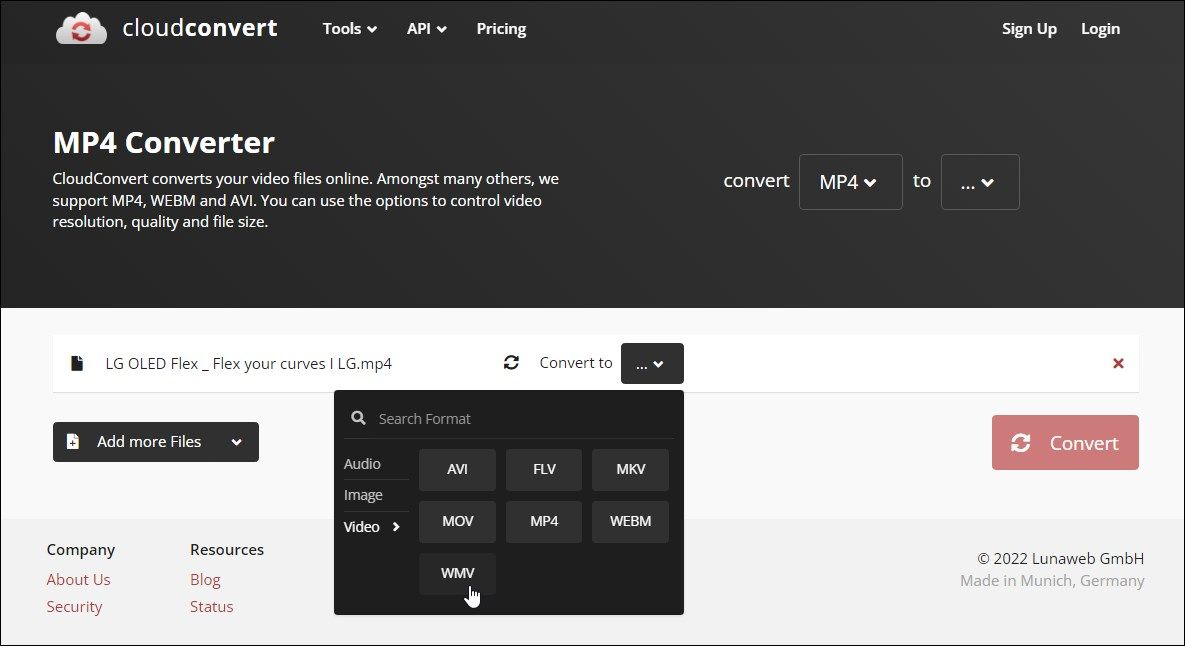
Windows Media Audio/Video (WMA/A) is a family of audio and video codecs developed by Microsoft. If you have any other audio or video files in unsupported formats, you can convert the files to WMA/WMV format to resolve the error.
This is useful if you have several file issues and don't want to install additional software or codecs on your computer.
Even file conversion doesn't require installing third-party tools. You can use free online file converters to convert media files to your preferred format.
Follow these steps to convert your media files to WMV format:
- Go to Cloud Converter. It's an online file converter that supports media and document conversion.
- Next, click Select file And upload your audio/video files.
- Next, click exchange Go to and select IN.
- Click Settings icon (wrench iconChange your video and audio output.
- Click exchange Click the button and wait for the upload and conversion process to complete.
- Once finished, click download The button saves the video to your local storage drive.
- To delete a video from the CloudConvert server, please click [link]. delete Button (X icon).
The Movies & TV app may be superseded by the new media player app in Windows 11. However, there are excellent alternatives to the Movies & TV app.
VLC Media Player, PotPlayer, Media Player Classic, and ACG Player top the list. If your movie and TV apps continue to malfunction, consider switching to a more advanced media player.

 Chinese (China)
  English
  Chinese (Taiwan)
  Russian
  Japanese